In order to post payments at batch level, it is important to create batch of EOBs in the system. When adding batch details, it is required to add at least 1 EOB in the batch.
To create new batch:
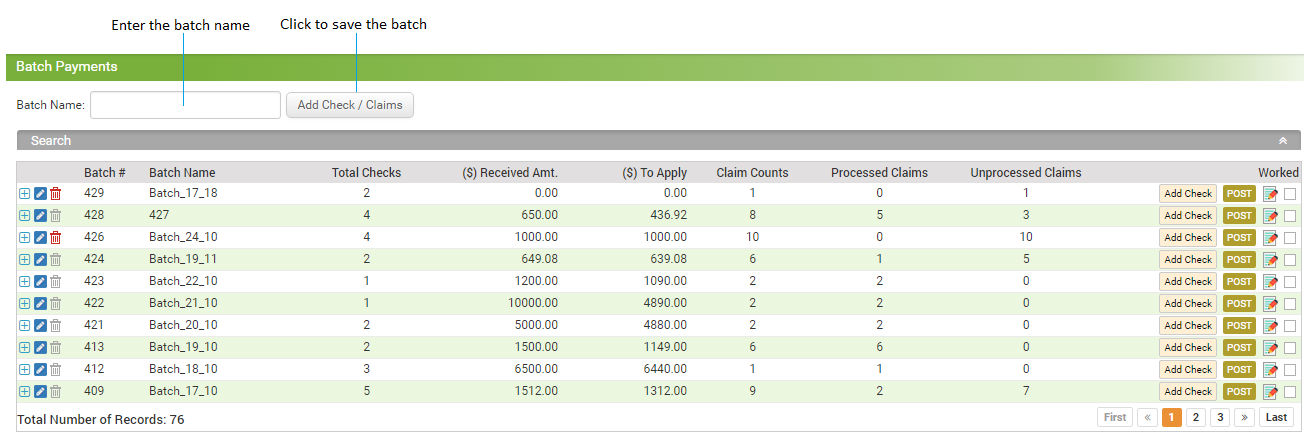
| 1. | From the left menu items, select Billing > Batch Payments. |
| 2. | Enter the Batch Name and click the Add Check / Claims button to add batch in the grid below it. |
| • | To expand the batch, click the  icon. After expanding the batch, you can add more claims and post payment for each claim as per your requirement. icon. After expanding the batch, you can add more claims and post payment for each claim as per your requirement. |
| • | To change the batch name, click the Edit icon  . . |
| • | To delete the batch details, click the delete icon  . . |
| • | To add EOBs to a batch, click the  icon. icon. |
| • | To post payment for a batch, click the  icon. icon. |
| • | To view the batch history who created or update the batch details, click the  icon. icon. |
| • | To mark the batch as Worked, select the check box from extreme right side in grid. You can use the search panel to filter Worked batches. |
| Note: Once you save the batch, system gives unique number to that batch for easy identification. This number is auto-assigned and non-editable. |