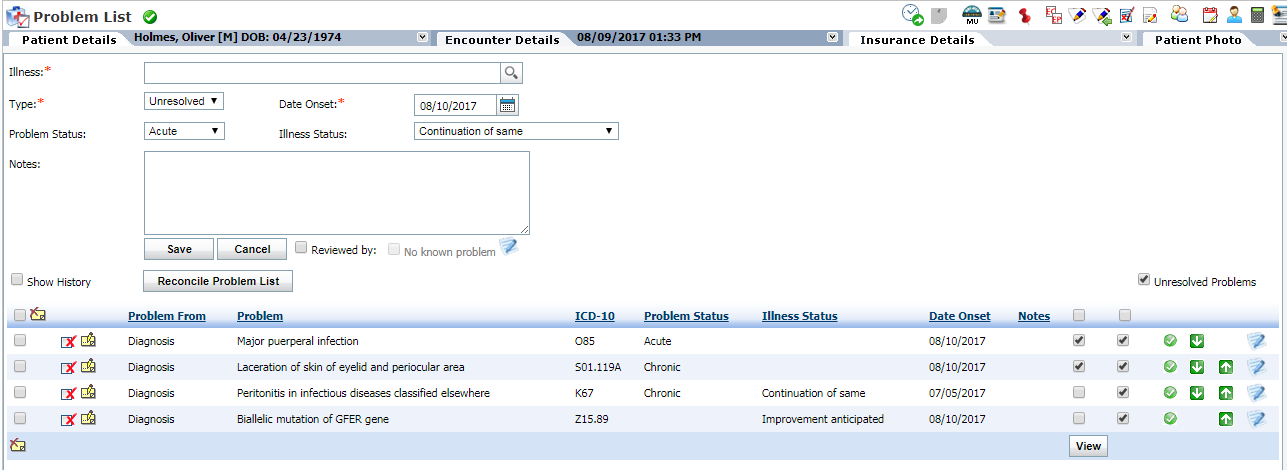
Problem List is a section that lists all the illnesses and the problems faced by the patient. Both the resolved and unresolved problems can be recorded.
Key points to know while Recording Problems
| • | The Problem Status and the Illness Status are preconfigured in the system. Contact InSync EMR Support to add or remove from the list. |
| • | If there are no problems to be recorded, select the No Known Problem check box as this helps in achieving Meaningful Use. |
| • | Once the problem is resolved or cured, click the icon corresponding to that illness to mark that illness as Resolved. corresponding to that illness to mark that illness as Resolved. |
| • | To view the list of active and inactive problems just select the Show History check box. |
Recording Problem list
| 1. | In the charting elements ribbon, click Problem List. The Problem List screen is displayed, by default, unresolved problems are displayed. Deselect the Unresolved Problems check box to view the list of resolved problems. |
| 2. | Type in the few characters of the Illness and select the illness from the smart search. |
| 3. | A pop up appears which displays the selected illness. You can add multiple illnesses at once and then click Save. You can remove the illness from the list by clicking the Remove button. |
| 4. | Select the Problem Type (resolved or unresolved) from the drop-down list. |
| 5. | Select the Date Onset using the calendar button. If you don’t know the exact date, you can enter the date, month, year, or any relevant text in the text box. |
| 6. | Select the Problem Status (chronic, acute, etc.) from the drop-down list. |
| 7. | Select the Illness Status (controlled, well controlled, etc.) from the drop-down list. |
| 8. | Enter the notes pertaining to problem list, if any. |
| 9. | Click Save. The selected illness is added to the grid. |
More features when Recording Problems
| • | After reviewing the problems, you can display the reviewer name along with the date and time by just selecting the Reviewed by check box. |
| • | The list of problems can be imported from Chief Complaints/HPI, ROS, and Diagnosis. Based on this, the Problem From is populated in the grid. |
| • | If a problem is added by mistake, it can be deactivated by clicking the Deactivate icon . You can deactivate one or more problems by selecting the corresponding problem check boxes and then clicking Deactivate icon . You can deactivate one or more problems by selecting the corresponding problem check boxes and then clicking Deactivate icon . . |
| • | To activate the selected problems, select the check box corresponding to the inactive problem and click the Activate icon . . |
| • | You can also view the education material related to the specific illness by selecting the check box in the Education column and clicking View. The education material can be exported to PDF, printed, and provided to the patient as well. Providing education material will help in increasing numerator for “Core 13: Use clinically relevant information from Certified EHR Technology to identify patient-specific education resources and provide those resources to the patient” of MU-2. Please refer to the above section in Meaningful Use Stage – 2 User Guide for more details. |
| • | Click the icon to view the details such as Created By, Created On, Modified By, and Modified On. to view the details such as Created By, Created On, Modified By, and Modified On. |